How To Do A Salon Quality Gel Manicure
Creating beautiful nails in the comfort of your own home
Nails | August 21, 2022
You like to keep your nails done but don’t feel like going to the salon every time to get them done. Or you are someone that enjoys the DIY life, either way, I get it. The thing is, you need more information on how to do a gel manicure on your nails. So, let this step-by-step guide help you do that.
I am not saying that your nails will turn out perfect the first few times you do this, but you will have a guide to lean on to help you get started. Are you ready?
Step 1: Prep The Nails
Music: Daze
Musician: KiaNi
You must start with filed, oil-free nails for a smooth application. First, clip your nails to the desired length and shape them with a nail filer.
Next, it’s time to work on your cuticles. You want to gently push back the cuticle and apply a cuticle softener. If you don’t have one, you can use water.
During this step, you want to remove any dead tissue around the cuticle and on the sides. You do so by using a nail scraper on the other side of the cuticle pusher, or you can use an orange stick.
If you have hanging skin around the cuticle, you can apply more cuticle softener and remove it. Or clip it off with cuticle clippers.
Tip: To double-check that you removed all the dry skin, just wipe the nail with alcohol. If you see dry skin, you can use a pumice stone soaked in alcohol, a nail file, or a buffing block to remove it.
With clean cuticles, you can now buff the whole nail to remove the oils from the fingernail. Afterward, brush off the excess dust and wipe the nails down with a nail surface cleaner or alcohol.
Then, you can move to step two or apply a dehydrator to the nail to ensure that there is no oil on the nail and follow with two coats of protein bond. This is optional.
Now your nails are prepped and ready for the polish.
Step 2: Apply Base Coat/Builder Gel
Apply a coat of base coat or builder gel (it is similar to base coat but with a thicker formula) and cure the nail for 30-60 seconds for an LED lamp or 1 minute for a UV lamp.
You are now ready to apply a gel color.
Step 3: Apply The Gel Color
Begin applying a thin coat of polish and try not to apply too much around the cuticle area. If you are using a light nail polish color, cure the nail for 30-60 seconds for an LED lamp or 1 minute for a UV lamp. If it is a darker color, cure for an extra 30 seconds.
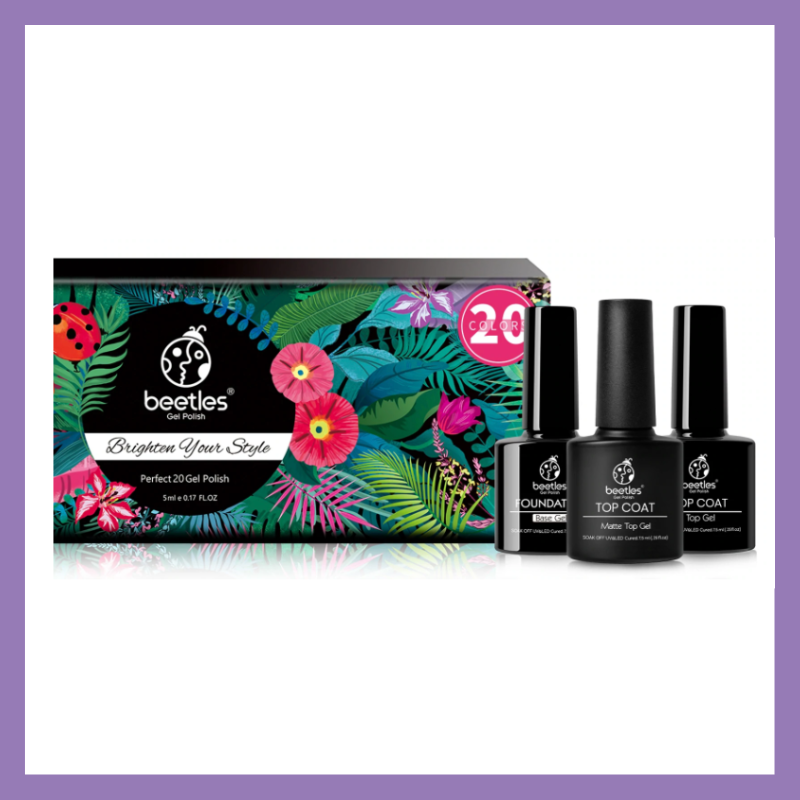
I am using color a493 from the Beetles gel nail polish set Girls Night. You can check out all the colors in my product review.
So, after you applied one coat you will repeat this step until you have reached your desired opacity. Most nail polishes only need two coats, but for extra light colors, you may need 3-4 coats.
You are almost done!
Step 4: Apply Top Coat
Seal in the polish and give it a finishing look by applying the top coat. Depending on the look you are trying to create, you will either use a glossy or matte top coat.
Like always, you will cure the nail for 30-60 seconds for an LED lamp or 1 minute for a UV lamp.
Look at those beautiful nails. Your nails are done, but there are one or two more things you should do.
Step 5: Cleanse and Oil the Nail
Some gel nail polishes leave a tacky layer that needs to be wiped down with alcohol. If your nail polish is not like that, then you can skip this part of the step.
Lastly, oil your cuticles to bring back shine to that area and enjoy the look of your creation.
I hope your nails look as good as you want them to, and if not, that is 100% okay. This is your starting point, and the more often you do this manicure, the better it will look.
It took me a few tries to understand what I was doing wrong. If you are having issues, I think the upcoming post on a gel manicure will help you. You could be doing something that is causing your manicure to look different than what you envisioned.
Enjoy your manicure!