
An ergonomic desk setup at home means your chair, screen, keyboard and mouse sit where your body can stay relaxed for hours. You set the chair first, then bring everything else to you. Most of it costs nothing: a stack of books, a cushion and a few minutes of adjusting usually do more than a new gadget.
Table of Contents8 sections
What Does an Ergonomic Desk Setup Look Like?
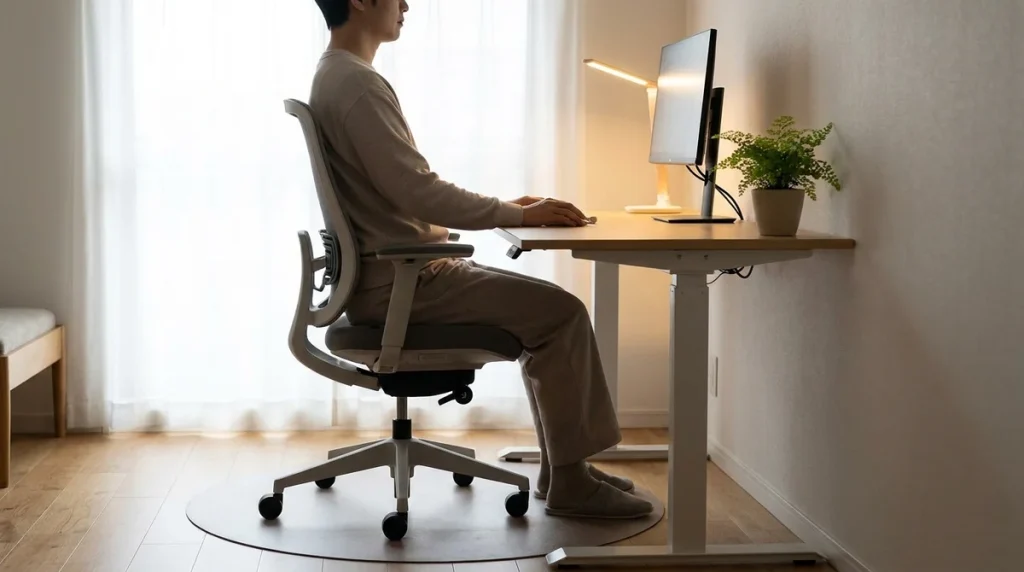
A good setup lets you sit back in the chair with your feet supported, shoulders loose, wrists straight and the top of the screen roughly level with your eyes. The UK Health and Safety Executive (HSE) sums it up in a few checks: the keyboard just below elbow height, the mouse in line with your elbow, and the screen about an arm’s length away.
There is no single perfect position to hold all day. Patient guidance from Cambridge University Hospitals in the UK makes the point that the time spent in one posture matters more than finding an ideal one. So the aim is a setup that feels easy, plus regular changes of position.
Step 1: Adjust the Chair Before Anything Else
Start with the chair because every other measurement depends on how high you sit. Sit right back so the backrest supports your lower back, rather than perching on the front edge.
Seat height
Raise or lower the seat until your thighs are supported along their length and your feet rest flat on the floor. HSE suggests a gap of 2 to 3 cm between the front of the seat and the back of your knee. If the seat is too deep for that, a firm cushion behind your back moves you forward.
Feet and lower back
If raising the seat leaves your feet dangling, put something solid under them. A footrest works, and so does a sturdy box or a couple of thick books. For the lower back, a small cushion or a rolled towel fills the gap when the chair has no built-in support.
Step 2: Set the Screen Height and Distance
Put the screen straight in front of you, with the top edge at or slightly below eye level. The US Occupational Safety and Health Administration (OSHA) gives a preferred viewing distance of about 50 to 100 cm (20 to 40 inches) from your eyes to the screen.
A quick check: sit back and stretch your arm out. Your fingertips should land near the screen. If you find yourself leaning forward to read, make the text bigger in your display settings before you move the screen closer.
Keep the screen and keyboard central. HSE warns against setups that make you twist your back to see the screen. If you use two monitors equally, place them side by side with the join in front of your nose. If one is your main screen, centre that one.
Step 3: Place the Keyboard and Mouse
The keyboard goes just below elbow height, close enough that your upper arms hang naturally by your sides. Leave a little space in front of it so you can rest your hands when you pause. Your wrists should stay straight while you type, not bent up or down.
Keep the mouse right next to the keyboard, in line with your elbow. Reaching out to the side for a mouse all day pulls the shoulder forward. If your shoulders creep up while you work, the desk is too high for the chair, so raise the seat and support your feet.
How Do You Set Up a Laptop at Home?
A laptop needs two separate parts to work well at a desk: something to raise the screen and a separate keyboard and mouse. HSE’s own laptop advice is to keep the keyboard and mouse apart from the laptop so the screen can sit higher, on a riser or a separate monitor.
Without a riser, a stable stack of books does the same job. Raise the laptop until the top of its screen is near eye level, then plug in a basic keyboard and mouse. These two items are usually the most useful first purchases for anyone working from a laptop.
Working at a kitchen table
Kitchen tables are often higher than desks, which pushes the shoulders up. Sit on a firm cushion to raise yourself, then put a box or books under your feet if they no longer reach the floor. Avoid working from the sofa or bed for long stretches, since neither lets you keep the screen high and your back supported.
A Quick Desk Setup Checklist
Check these seven points, from the chair and feet to the screen, keyboard, mouse, shoulders and light, once when you set up and again if anything starts to ache.
| Part | What to check |
|---|---|
| — | — |
| Chair | Sitting right back, lower back supported, thighs level |
| Feet | Flat on the floor or on a footrest, box or books |
| Screen | Top edge at or just below eye level, about an arm’s length away |
| Keyboard | Just below elbow height, wrists straight |
| Mouse | Next to the keyboard, in line with your elbow |
| Shoulders | Relaxed, not raised or pulled forward |
| Light | No glare on the screen from windows or lamps |
How Often Should You Take Breaks From the Desk?
Take short, frequent breaks rather than long, rare ones: HSE gives the example that 5 to 10 minutes every hour is better than 20 minutes every 2 hours. A break can be anything that gets you out of the chair: making a drink, taking a phone call standing up, or a short walk.
A good chair setup still won’t make sitting still for three hours comfortable. Set a timer if you lose track of time, and stand up when it goes off.
Changing tasks counts too. Reading a printout away from the desk or stepping away for a call gives your eyes and back a change.
When Should You Talk to a Doctor?
Talk to a doctor or a physiotherapist if aches in your neck, back, shoulders or wrists keep coming back after you have adjusted your setup. Get advice sooner if you notice numbness, tingling or weakness in your hands or arms, or pain that stops you working or sleeping. A setup change is a comfort measure, not a treatment, and a professional can check what is going on.