
To recaulk a bathtub, cut and scrape out all the old caulk, clean off any mould, let the joint dry completely, mask both sides with tape, then run a steady bead of bathroom silicone and smooth it in one pass. The work fits into an afternoon, but drying and curing mean the bath is usually out of use for a day or so. In the UK, caulk is usually called sealant, and the steps are the same.
Table of Contents9 sections
When Does a Bathtub Need Recaulking?
Recaulk when the old bead is cracked, peeling away from the tile or tub, or stained black with mould that won’t scrub off. Gaps let water get behind the tub, where it can damage the wall and floor without you seeing it.
Before you start, press on the tub and the floor around it. If the tub flexes, tiles are loose, or the floor feels soft, there may be water damage underneath. New caulk won’t fix that, and it is worth having a plumber or builder take a look first.
What You Need
The job needs one tube of mould-resistant bathroom silicone or sealant and a handful of tools: a caulking gun, a scraper and utility knife, masking tape, gloves and a cleaner.
- Bathroom silicone or kitchen and bathroom sealant, labelled as mould-resistant and waterproof
- A caulking gun, if the tube needs one
- A plastic caulk removal tool or scraper, and a utility knife
- Caulk remover (optional, for stubborn residue)
- Rubber gloves, safety glasses and an old cloth
- Masking or painter’s tape
- Rubbing alcohol or a cleaner recommended on the caulk label
Silicone or acrylic caulk?
For the joint between a bath and the wall, silicone is the usual choice because it stays flexible and waterproof. Acrylic or latex caulk is easier to smooth and clean up, and it can be painted, but it is better suited to dry areas. Some products combine the two. Read the label: it tells you the surfaces the caulk suits and how long it needs before it can get wet.
Step 1: Remove All the Old Caulk
New caulk doesn’t stick properly to old caulk, so every trace has to go. Slice along the top and bottom edges of the old bead with a utility knife, holding the blade flat to the surface, then pull the strip away. A plastic removal tool or scraper lifts what’s left without scratching the tub.
Go carefully on acrylic and enamel baths, which scratch easily. Test any blade or scraper in a hidden spot first. For thin, stubborn film, apply a caulk remover, leave it for the time on the label, and then scrape again.
Step 2: Clean Off Mould and Soap Scum
Clean the joint thoroughly so the new caulk bonds to bare, clean surfaces. Scrub with a bathroom cleaner to remove soap scum, then deal with any mould left in the gap.
If you use bleach, the US Centers for Disease Control and Prevention (CDC) says to use no more than 1 cup of household bleach in 1 gallon of water (about 240 ml in 4 litres). Wear rubber gloves and eye protection, and open a window.
Never mix bleach with ammonia or other cleaners. The CDC warns that this produces a poisonous gas. Rinse off one product completely before using another.
Don’t seal over mould you can still see. The EPA advises against caulking or painting over mouldy surfaces, because the mould keeps growing underneath. If mould covers a large area, roughly more than 10 square feet, the EPA recommends professional help.
Finish by wiping the joint with rubbing alcohol, which removes the last of the soap film and helps it dry.
Step 3: Let the Joint Dry Completely
The joint must be completely dry, because caulk won’t seal properly on a damp surface. Leave the bathroom with the window open or the extractor fan running. Many guides suggest waiting overnight, and longer if the gap was wet and deep.
Some people fill the bath with water before caulking. The weight lowers the tub slightly, so the caulk sets at its widest gap and doesn’t stretch and crack the first time someone takes a full bath. It is optional, but worth doing with lightweight acrylic baths. Drain the water only after the caulk has cured.
Step 4: Tape Both Sides of the Joint
Masking tape gives you two straight edges and keeps caulk off the tiles and tub. Run one strip along the wall, a few millimetres above the joint, and another along the tub edge, the same distance below. Keep the gap even all the way along.
Press the tape down firmly so caulk can’t creep underneath. This step takes about ten minutes and makes the biggest difference to how neat the finished job looks.
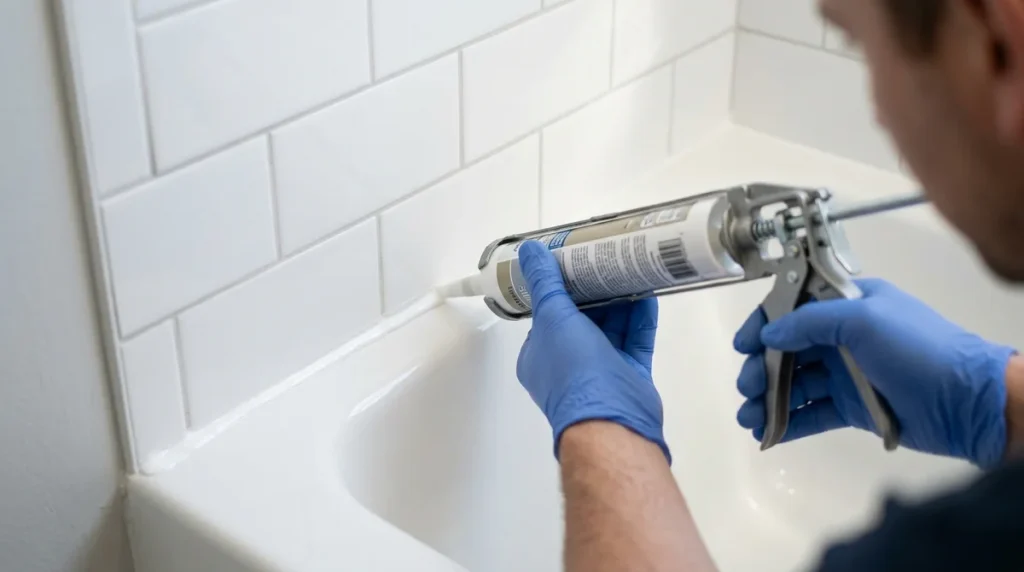
Step 5: Apply and Smooth the New Bead
Cut the nozzle at a 45-degree angle, a little smaller than the gap, because you can always widen it. Load the tube into the gun and squeeze gently until caulk reaches the tip.
- Start in a corner and hold the gun at a steady angle.
- Squeeze with even pressure and move at a steady pace along the joint, pushing the caulk into the gap. If it piles up, speed up. If the line breaks, slow down.
- Work one wall at a time, finishing each run without stopping if you can.
- Smooth the bead straight away with a wet fingertip, a damp cloth or a smoothing tool, in one continuous stroke.
- Pull the tape off immediately while the caulk is still wet, peeling it away from the joint at a low angle.
Wipe up stray caulk at once with a dry cloth. Silicone is much harder to remove once it starts to skin over.
How Long Before You Can Use the Bath?
Many bathroom silicones need around 24 hours before they get wet, and some fast-curing products are ready sooner, so follow the cure time on the tube, because it varies between products. Leave the bathroom ventilated while it cures.
Once cured, keep the new seal in good shape by wiping the joint dry after showers now and then, and running the extractor fan during and after bathing. When the caulk starts to crack or peel again, repeat the job before water gets behind it.
Common Recaulking Mistakes
Most problems come from rushing the preparation. Watch for these:
- Caulking over old caulk, which leads to peeling within weeks.
- Sealing a damp joint, which stops the caulk bonding.
- Using too much caulk, which makes a lumpy bead that is hard to smooth.
- Leaving the tape on until the caulk dries, which tears the edge.
- Using a general-purpose decorator’s caulk in a wet area instead of a bathroom silicone.